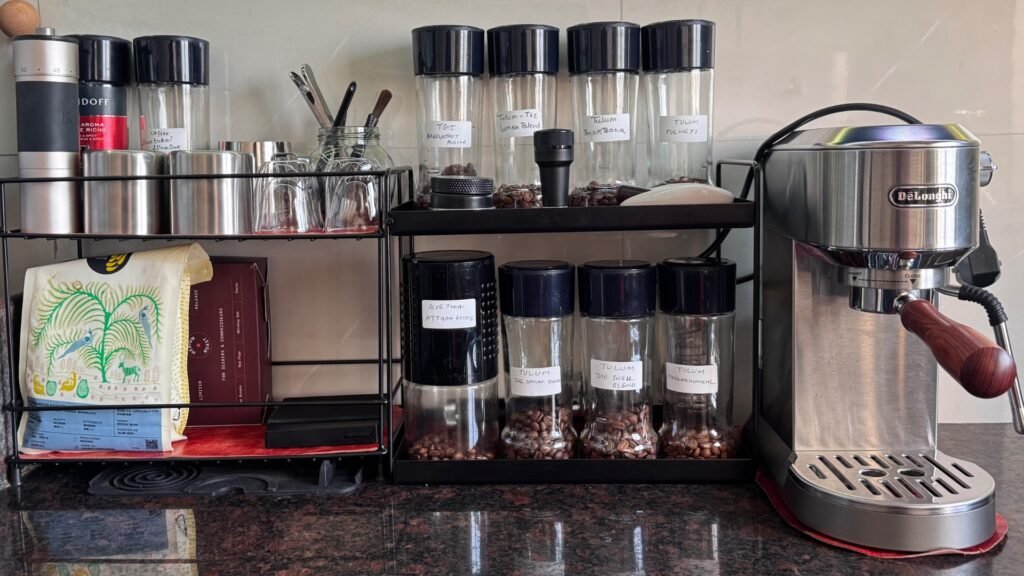
I decided to write this article to pen down the research I did while setting up my own home espresso station. This is essentially a beginner’s guide for setting up your own espresso station. What you should know, what you actually need to buy, which mistakes to avoid, and what things are non-negotiable.
The focus of this article is espresso, but even if you are setting up a pour-over or any other type of coffee station, you should still get a good overall idea of what you need to focus on and where you should spend your money.
Espresso Machine
The first and foremost thing you need is an espresso machine. The job of the machine is to provide the pressure and temperature required to extract the soluble compounds from coffee grounds and produce a shot of espresso.
Pressure is important because water needs to be forced through the compact coffee puck for espresso extraction. Around 9 bar at the coffee puck is generally considered a good target for traditional espresso. This is why you should not assume that an espresso machine capable of producing 15 or 19 bar will make better espresso than one operating at 9 bar. In fact, those higher numbers usually refer to the maximum pressure the pump can generate, rather than the pressure actually being applied to the coffee puck during extraction. So, when choosing an espresso machine, do not fall for the marketing that a higher maximum pressure automatically means a better machine or better espresso.
Now the obvious question is, how much should you spend on an espresso machine? Do you actually need a very expensive machine when you are just starting your espresso journey?
The short answer is no.
A more expensive machine does not necessarily make fundamentally different espresso just because it is more expensive. At its core, an espresso machine needs to provide consistent temperature and pressure. What you are really paying for as you move up the price ladder is reliability, repeatability, temperature stability, build quality and additional control.
For example, more expensive machines may have PID temperature controllers that allow much more precise control over brewing temperature. They may also have better temperature stability, more consistent pressure regulation, better materials and build quality, and additional features such as 3-way solenoid valves, pressure gauges and more sophisticated sensors.
All of these things make the machine easier and more consistent to use. But at its core, it is still providing you with the same two fundamental things, water at the right temperature and pressure.
For a beginner, I would therefore recommend spending enough to get a machine that can provide these fundamentals consistently rather than spending a huge amount simply because an expensive machine is supposed to produce better espresso.
Coffee Grinder
The second thing you need is a coffee grinder. In fact, I would argue that the grinder is the most important part of your coffee setup, although technically, you can start your espresso journey without one.
You can buy pre-ground coffee from a cafe or any roaster and use that to start making espresso. But the difference freshly ground coffee makes is significant, and once you start grinding your beans fresh, it becomes very difficult to go back.
A good grinder can completely change your espresso. The biggest advantage of having your own grinder is being able to grind your coffee just before brewing. Once coffee beans are roasted, they slowly lose their freshness as they are exposed to oxygen. Grinding the beans increases the surface area exposed to oxygen by a huge margin, which accelerates this process significantly. This is why pre-ground coffee tends to lose its aroma and flavour much faster than whole beans. With freshly ground coffee, you retain much more of the coffee’s aroma and flavour, and the difference becomes particularly noticeable in espresso, where a relatively small dose of coffee is responsible for the entire flavour of the shot. Fresh grinding also gives you control over the grind size, which is essential for dialling in espresso. You can make the grind finer or coarser depending on how the coffee is flowing and adjust the extraction to get the flavour you want.
Whether you choose an electric or manual grinder depends largely on your budget and how much effort you are willing to put into grinding. But one thing you should pay particular attention to is, burr geometry.
Different burr geometries produce different particle-size distributions, and this can have a significant effect on how your espresso tastes.
For example, some burr designs produce a higher proportion of fines. These can contribute to a heavier-bodied and more traditional espresso profile, which can often emphasise chocolaty, nutty and richer flavours.
Other burr designs produce a more uniform particle distribution with fewer fines. These can produce a cleaner and higher-clarity espresso where fruity, floral and brighter notes are easier to distinguish.
This is why I would recommend deciding what kind of coffee you actually enjoy before finalising your grinder.
If you enjoy traditional, full-bodied and chocolate-heavy espresso, your grinder requirements can be very different from someone who prefers light-roasted coffee with fruity and floral flavours. The grinder is therefore not simply about how well it can grind. The burr geometry and the type of grind it produces are equally important.
A good grinder can be a little expensive, but it is absolutely worth spending more. The grinder controls a lot of variables that have a direct impact on the taste of your coffee.
Portafilter and Baskets
The portafilter and basket are absolute necessities, and they generally come with the espresso machine. The problem is that many entry-level machines come with pressurised baskets as the standard option. And there is a very good reason for this, they are extremely beginner-friendly and forgiving.
With a pressurised basket, you can put in your ground coffee, tamp it and get a reasonably decent-looking espresso even if your grind size and puck preparation are far from perfect. But if you want to take your espresso to the next level, I would highly recommend switching to a non-pressurised basket.
The fundamental difference between both is how pressure is generated. A pressurised basket has multiple holes on the inside but a restricted outlet on the outside. This restriction creates additional back pressure, which means the basket can produce pressure even when the coffee puck itself is not providing enough resistance. A non-pressurised basket, on the other hand, has holes throughout the basket and does not artificially create this additional restriction. The resistance comes primarily from the coffee puck itself.

And this is where espresso starts getting complicated. With a non-pressurised basket, your grind size, coffee dose, distribution and tamping suddenly become extremely important. Even a small change in one of these variables can have a noticeable effect on the shot. A non-pressurised basket is less forgiving, but it gives you much more control over the extraction and allows the characteristics of the coffee to come through more clearly.
Once you move to a non-pressurised basket, you also need to choose between a traditional spouted portafilter and a bottomless portafilter. A spouted portafilter has two outlets and can divide the espresso between two cups. A bottomless or naked portafilter has no spouts and leaves the bottom of the basket completely exposed.
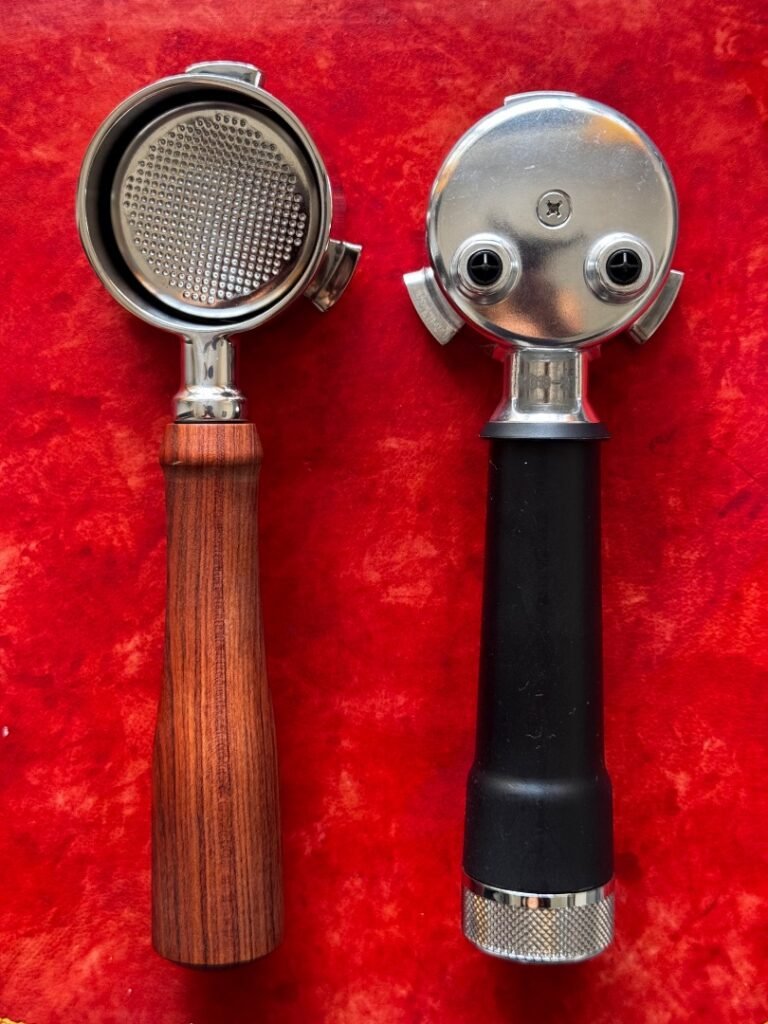
I would highly recommend a bottomless portafilter if you are serious about learning espresso. It allows you to see exactly how the espresso is flowing out of the basket. Channeling, uneven extraction and other puck-preparation issues become much easier to identify. It is not necessarily going to make the espresso taste better by itself, but it is an excellent learning tool.
Puck Preparation Tools
Once you move to a non-pressurised basket, puck preparation becomes one of the most important parts of the process. This is where your espresso can either come together beautifully or completely fall apart.
The first tool I would recommend is a WDT tool (Weiss Distribution Technique). It is used to distribute the coffee grounds evenly and break up clumps before tamping. I cannot stress enough how important even distribution is. I was having channeling issues in the beginning, simply because my dosing funnel was leaving a very small gap around the outer edge of the basket. The moment I started distributing the coffee around the outer periphery after removing the funnel, my shots improved significantly. That small change completely changed the espresso for me.
The next is a tamper. Ideally, the tamper should match the internal diameter of your basket as closely as possible so that the coffee puck can be compressed evenly. You will also need to learn how to tamp evenly, as it takes some practice to understand how much pressure to apply and how to create a level puck. If you still find tamping difficult, you can opt for a self-calibrating, spring-loaded tamper. These only require you to press down, and the spring mechanism ensures consistent tamping pressure and a level puck every time.
A leveller can also be used to distribute the grounds and create a more even surface before tamping. However, I would consider this more of a convenience than an absolute necessity. Good WDT and proper tamping can achieve the fundamental goal. But it certainly improves the workflow, so if your budget permits, you can consider it as well.
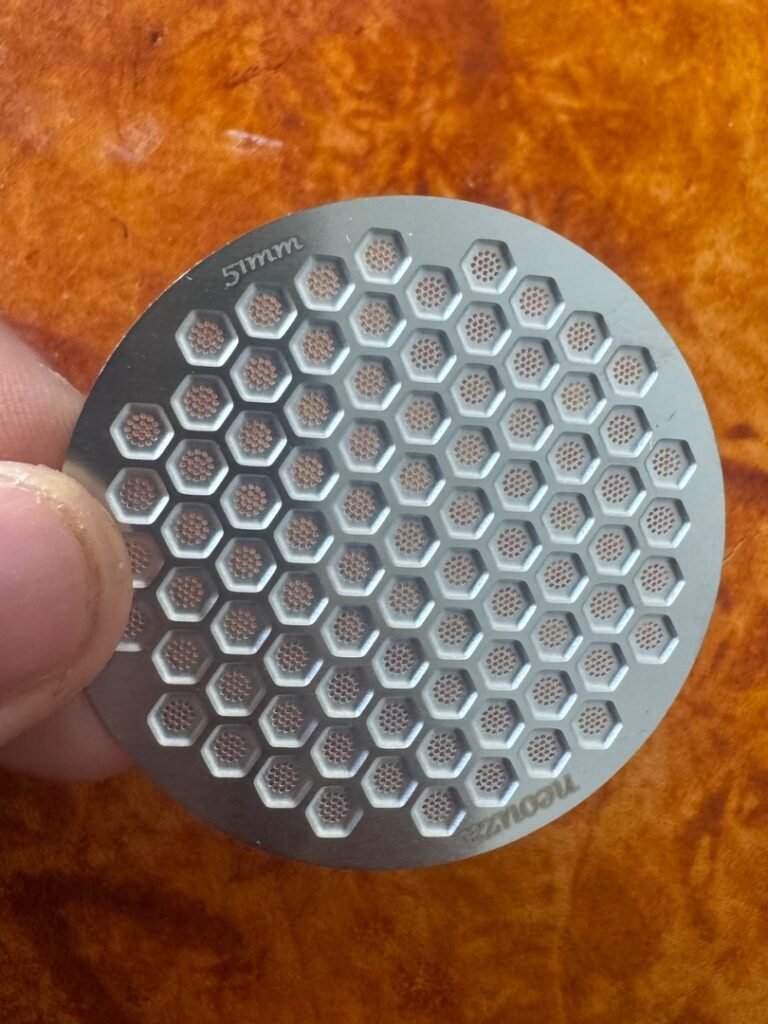
Another accessory you can consider is a puck screen. A puck screen sits on top of the coffee puck and can help keep the shower screen and group head cleaner. It can also help with water distribution across the puck. But unlike a good grinder, WDT tool and properly sized tamper, I would not consider a puck screen an absolute necessity when setting up your first espresso station.
Weighing Scale
If you want to recreate your favourite shot again and again, you need to know exactly what you did when you first made it. And for that, you need a good coffee scale.
You need to be able to accurately measure your coffee dose and the amount of espresso you extract. Once you start doing this, you can actually repeat a recipe instead of trying to guess how much coffee you used or how much espresso came out.
I initially tried to save money here by buying a jeweller’s scale. It seemed like a smart way to save some money, because technically the scale was capable of measuring small quantities accurately. But in practice, I found the readings inconsistent. Every time I weighed my coffee beans, I would sometimes get different readings. Eventually I decided that trying to save money on the scale was actually costing me more in wasted coffee.
A proper coffee scale gives you much more confidence when dialling in. Instead of treating every shot like it is your first, you can measure your dose, track your yield and repeat the recipe when you get a shot that you really like. I would therefore consider a reasonably accurate scale with a fast response and a built-in timer to be one of the essentials.
Some More Accessories
There are some more accessories that are not essential but can improve the workflow significantly. For example, a dosing funnel can prevent coffee grounds from spilling and make puck preparation easier. A dosing cup can also be quite useful for weighing and transferring your dose into the grinder.
Happy Brewing
Brewing my own coffee is one of the best hobbies I have found. It is as addictive as the coffee itself. It will take you down a rabbit hole where you will find yourself wanting to purchase every accessory that can even slightly improve your shots. But if you genuinely enjoy this hobby, most of these purchases won’t go wrong. Just make sure you do your research before buying anything, and enjoy the process along the way.